
How to Make a Macrame Round Bag
Macrame round bags, constructed through a series of square knots, offer a sturdy yet lightweight accessory perfect for summer, requiring only cord and patience to create. As long as you can tie a square knot, this stylish piece is easy to craft and serves as a great conversation starter.

Michael Breg
EDITOR
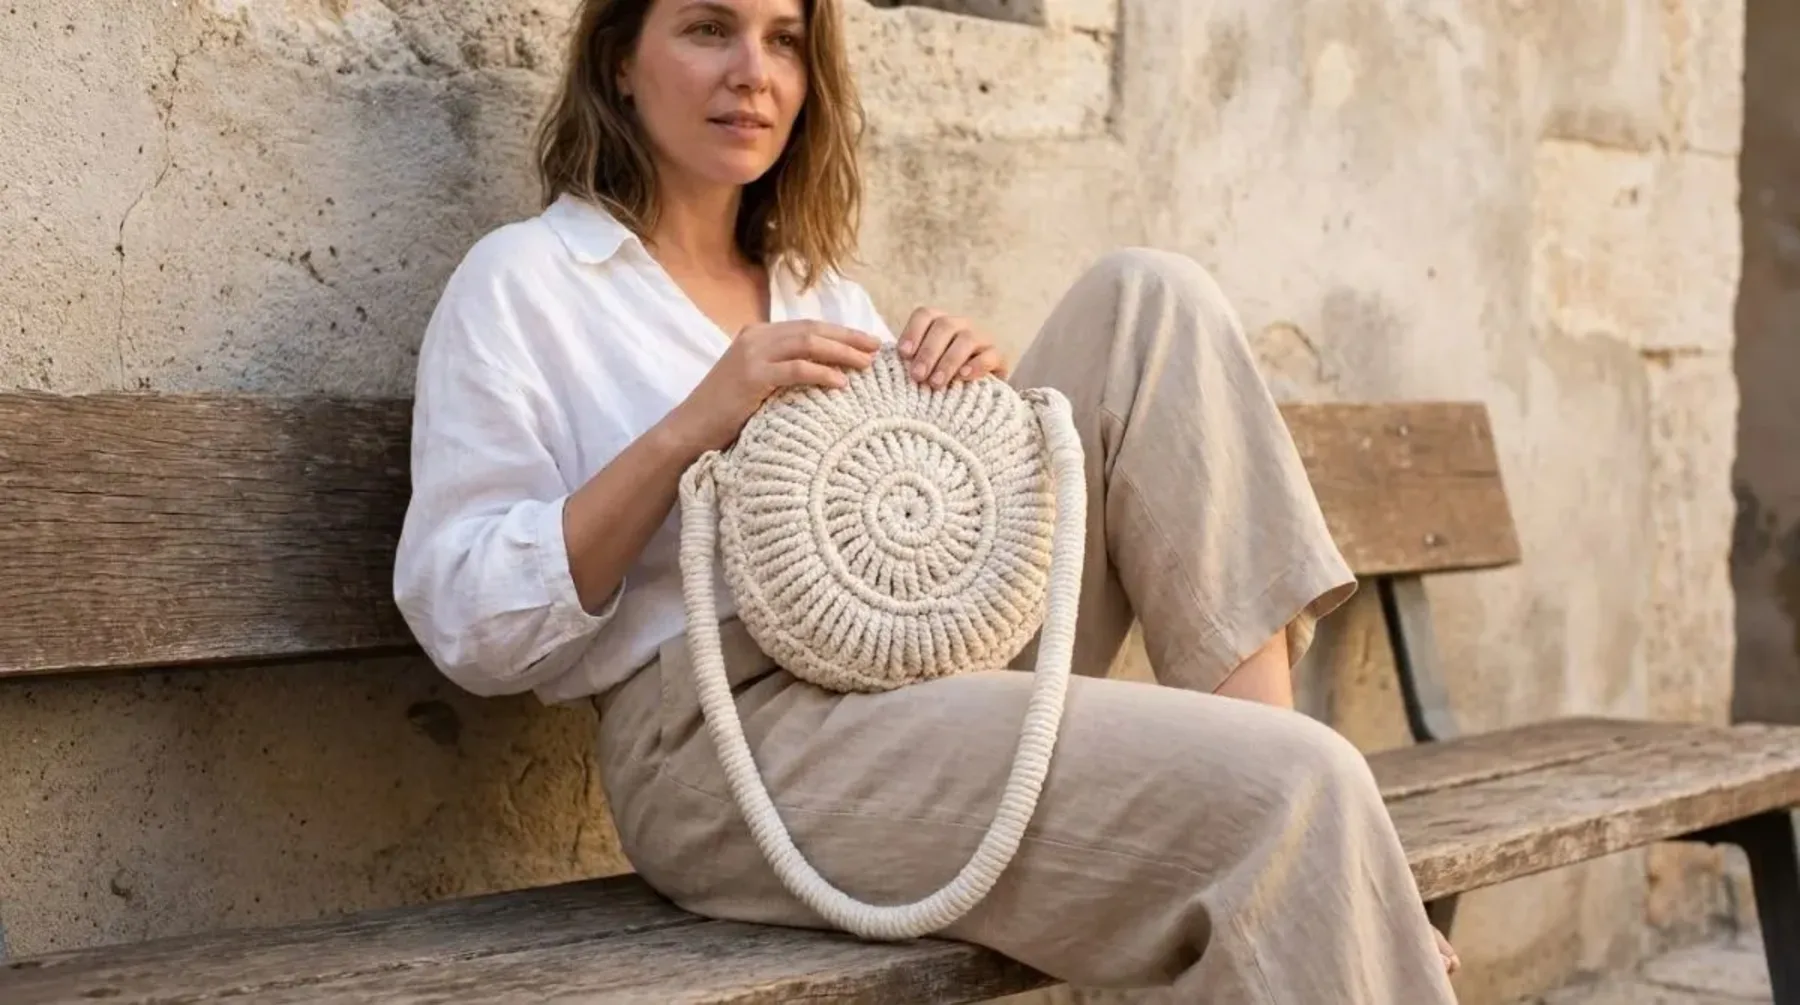
The wait is almost over to make a stunning Macrame Round Bag, as this digital tutorial combines your enthusiasm for fiber art and macrame to help you create a beautiful boho purse. It's an easy and simple thing for beginners and will add a touch of elegance to any outfit.
Let's get started
Materials Needed
Macrame cord, 4–5mm single-strand (recycled cotton or similar), natural/cream — about 100–150m total
A metal ring or wooden ring (~3–4cm) to anchor the spiral center
2 metal clasps/carabiner hooks (for the strap)
Comb or brush (to fluff/blend fibers if using single-strand cord)
Scissors, T-pins, and a foam board or cushion to pin your work flat
Step 1: Anchor the Center
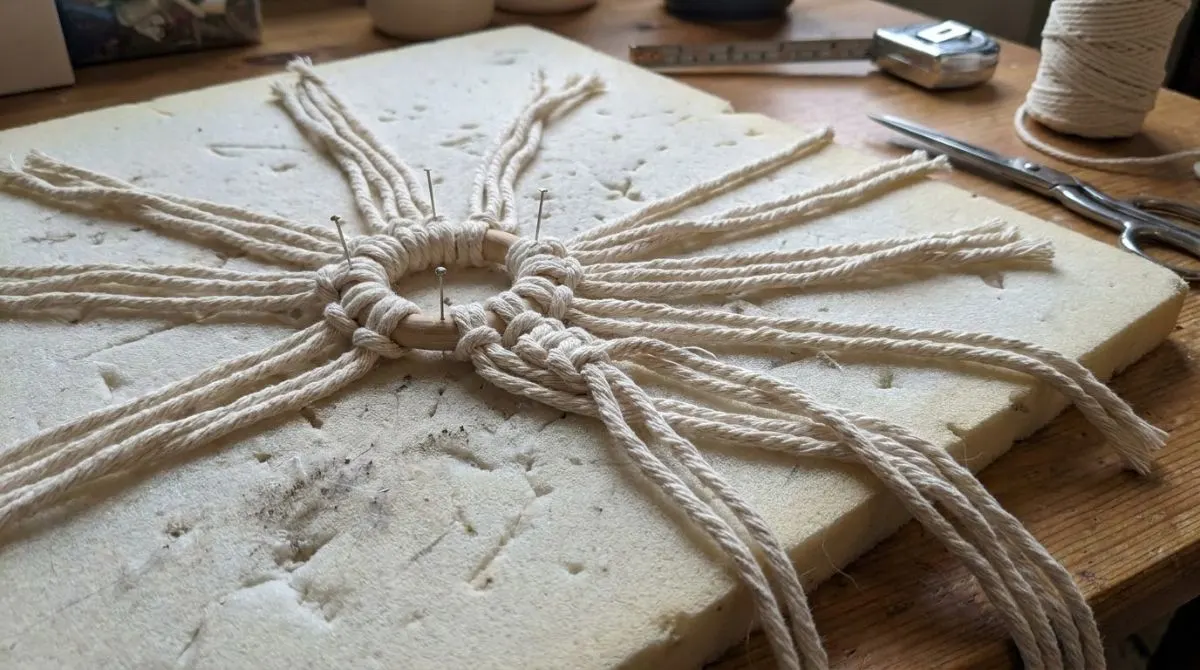
Cut 8 to 10 cords, each about 2 to 2.5 meters long (longer cords let you work the spiral without splicing constantly).
Fold them in two and attach them to your ring using lark's head knots – in this way you will have 16 to 20 working strands spreading out from the center.
Step 2: Build the Radial Spiral (Double Half Hitches)
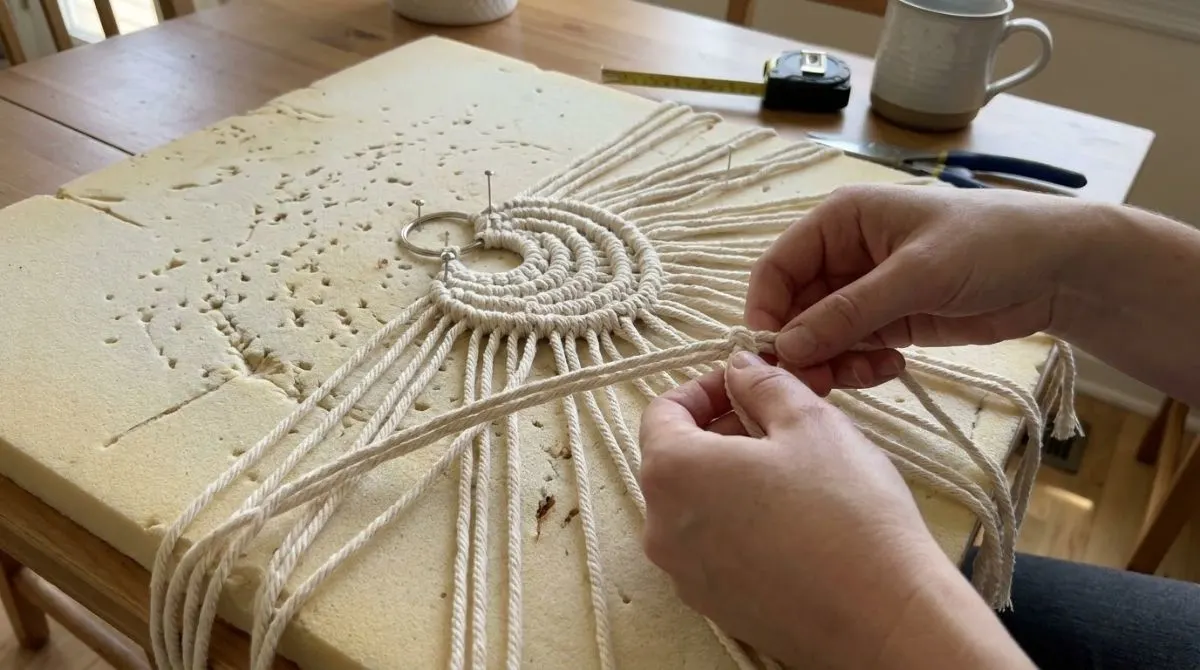
This is the technique that creates the swirled rounds you see in the photo:
Fasten your ring to the board so that the strands spread out like spokes.
For your first 'carrier' cord, select one strand and place it diagonally over the adjacent strands.
Secure a double half hitch on each strand to the carrier, moving around in one direction (either clockwise or counterclockwise—choose one and stick to it).
When you finish one full round, take up a new carrier cord right beside where the previous one ended and carry on—this staggered carrier method creates the illusion of a continuous spiral rather than concentric circles.
Make sure the tension is even, and make sure the knots are tight compared to the previous round so the item lies flat rather than becoming cupped or rippled.
Step 3: Increase as You Go
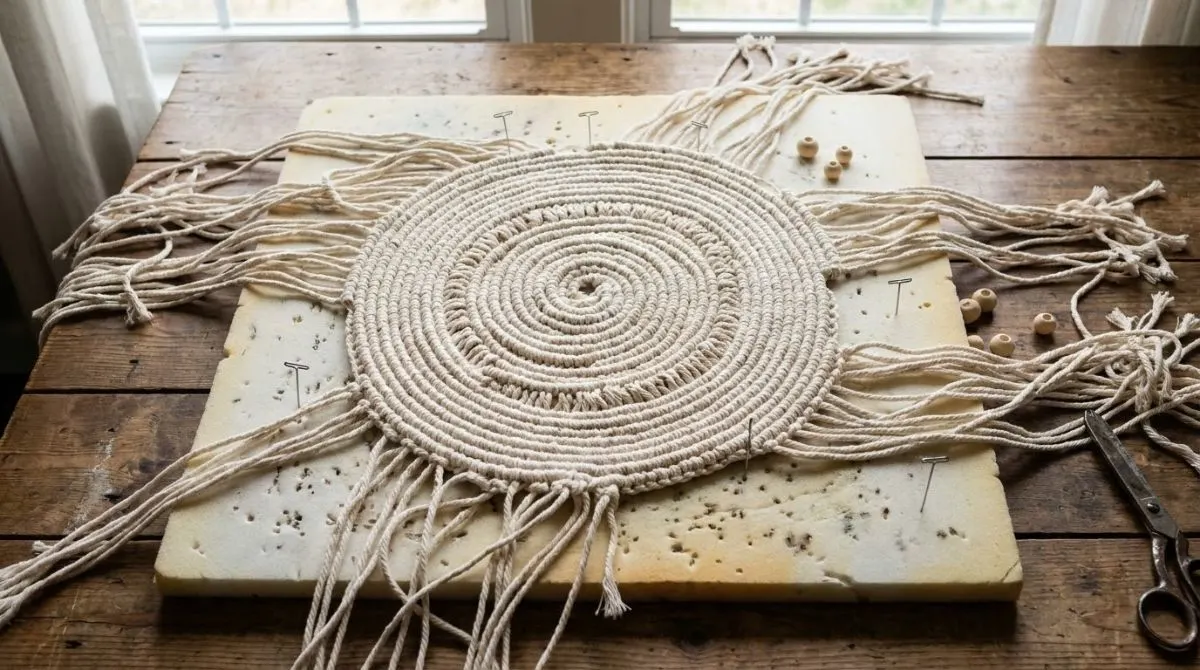
Since the circle widens as you spiral out, add space or introduce new strands from time to time over a few rounds so the piece doesn't pucker or curl inward. Frequently check that the piece is flat against the board.
Step 4: Repeat for Two Matching Discs
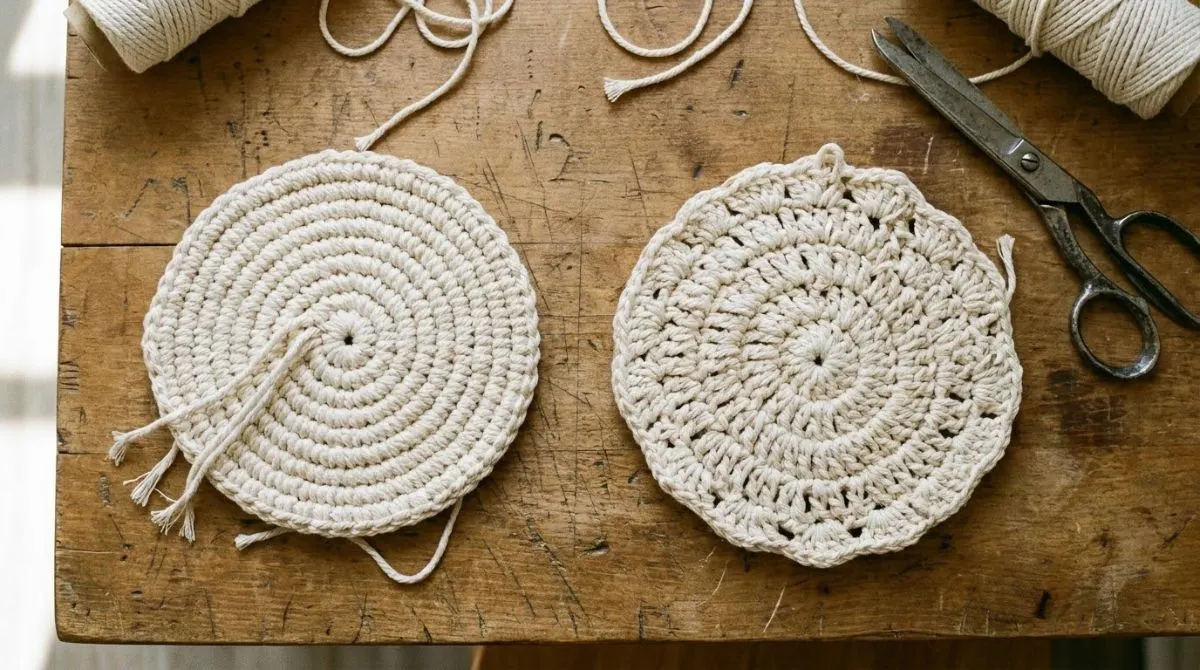
Create a second spiral disc of the same size—this will serve as the back panel, or else fold the one large spiral disc in half if you prefer a seamless bottom (refer to the reference photo to see whether there is a seam along the sides; if there isn't one, then simply fold the single disc in half)
Step 5: Join the Edges
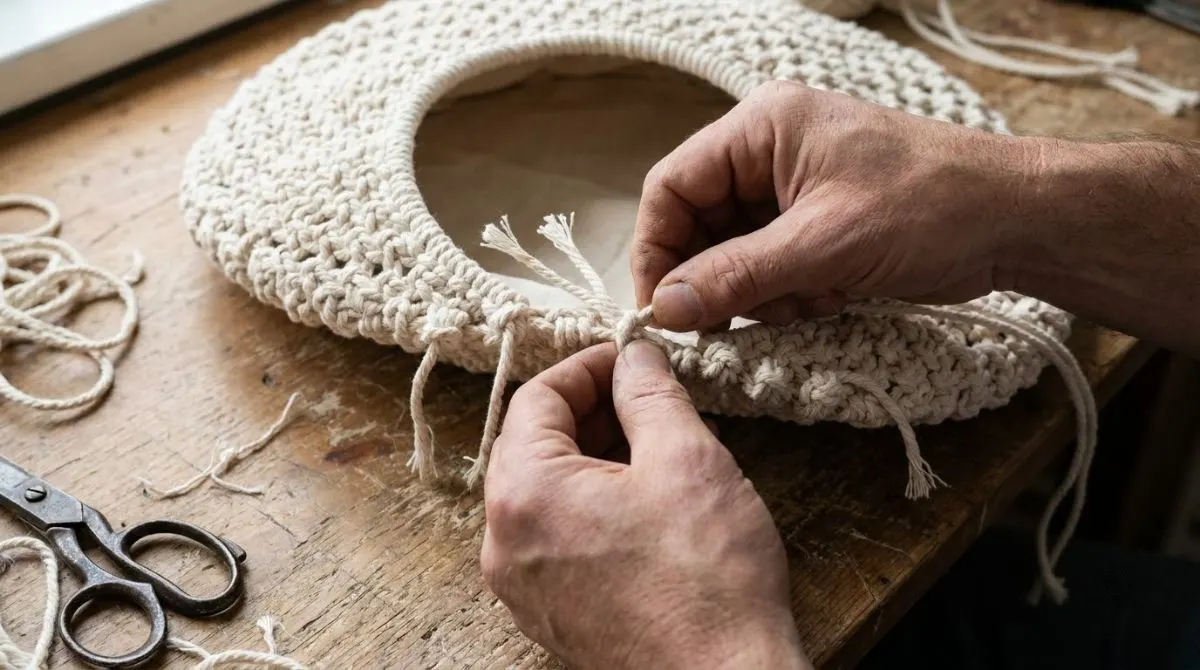
Fold the discs in half or join two discs.
To secure the outer edges, use double half hitches or simple overhand knots in pairs, leaving the top open since it will form the mouth of the bag.
When closing it, pull and tuck the loose ends into the seam.
Step 6: Make the Wrapped Strap
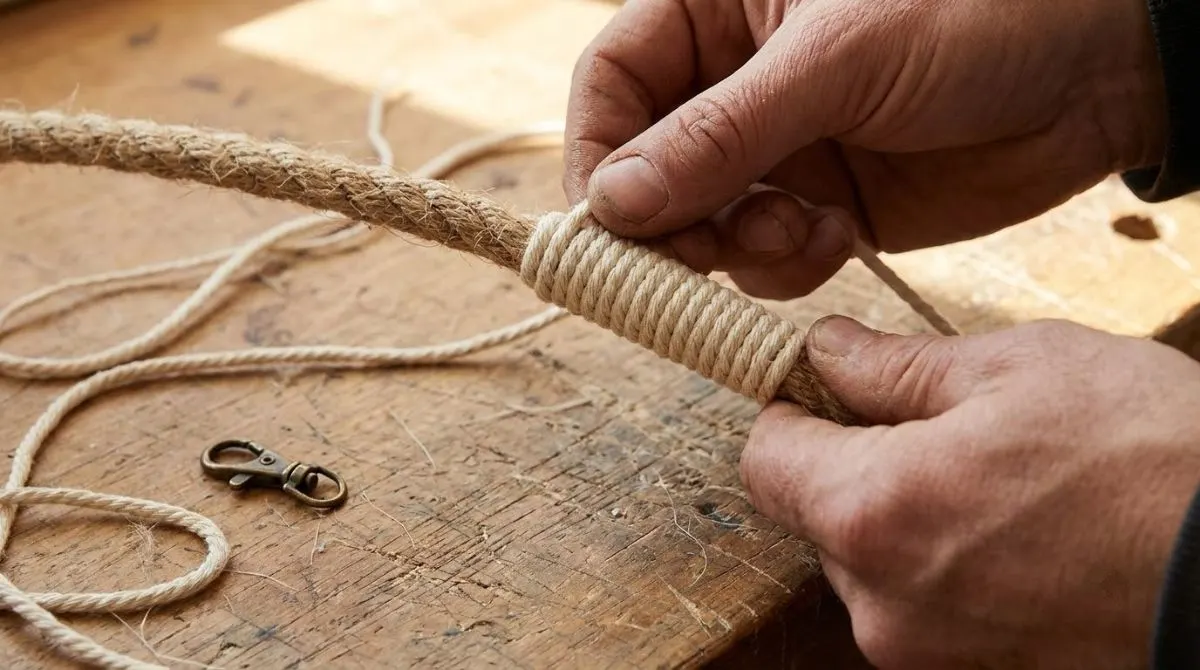
Get a long piece of cord (or else several strands twisted or braided together) for your strap core.
Take a separate cord and wrap it tightly around the strap in a spiral, making sure to cover the core entirely (this creates the thick, textured rope appearance in the photo).
Fasten both ends and screw on a clip or loop at each end.
Step 7: Attach the Strap
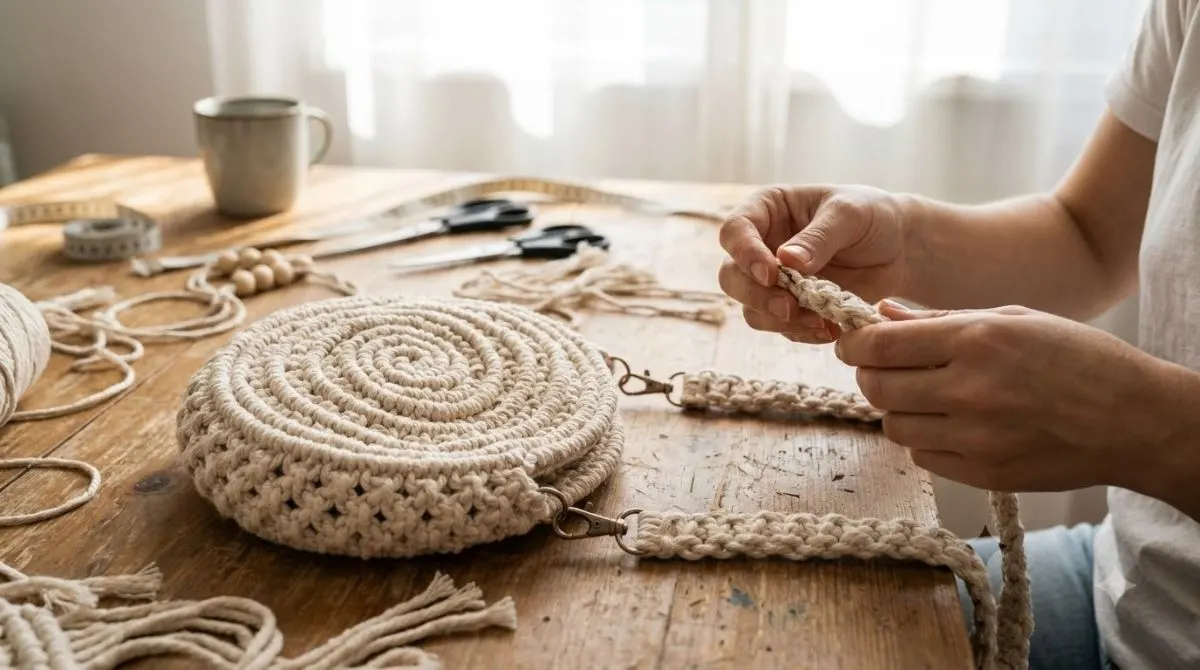
Sew or attach the ends of the strap to the sides of the bag near the top opening, using the metal ring or clasp hardware for a neat finish.
Step 8: Finishing
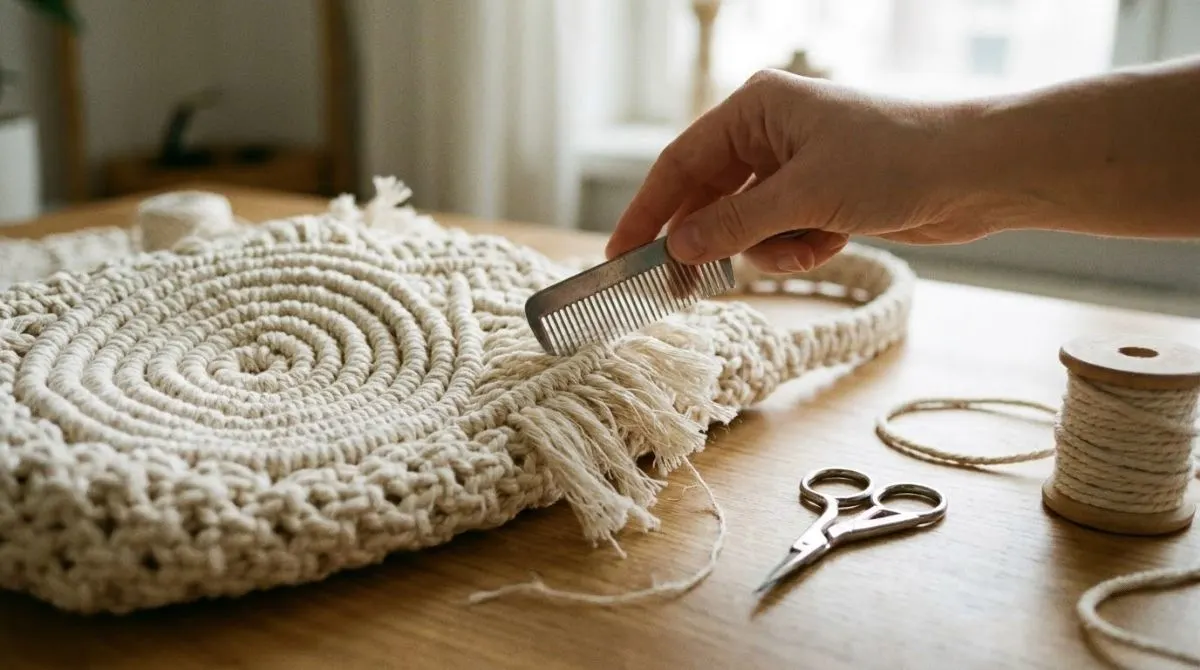
If you want a soft, frayed finish, comb the ends of any single-strand cords.
Trim stray fibers evenly.
Use steam or a light mist and press it down to ensure that the spiral sits properly.
Your round spiral macrame bag is now complete!

Written by Michael Breg
Studio Writer.
Enjoyed this informational guide?
Discussion (0)
No comments yet. Be the first to share your thoughts or ask a question!
Join the Discussion
Your email address will not be published. Required fields are marked *